最后的绿洲S4版本-自托管文档
Classic Last Oasis Self Hosting Documentation
How to Set It Up
One of our community members, SirTuvok, has made a visual guide for this process!
If you own Last Oasis on Steam, you should also have access to the Last Oasis - Dedicated Server application. Keep in mind it’s under Tools, not Games, when you’re looking for it on Steam. If you don’t have the option to download it, restart Steam. Use the classic branch.
The connection from your game server to our backend should be setup automatically. Right now you can change the amount of slots per server, but should keep in mind that it’s best to limit it to 100.
You will need to login to MyRealm using Steam, and grab a few keys used for the server setup. Specifically, you will require a CustomerKey, which is used in all servers you’re using on that realm, and a ProviderKey.
ProviderKey can be utilized as many times as you want in as many different servers in the same realm. CustomerKey must be the same across all servers in a realm.
Both keys can be found in the Hosting/Providers section of MyRealm.
For reference: CustomerKey is called “Game server registration key” in the MyRealm website, there will only be one available per realm owner, and it cannot change. ProviderKey is called “Self hosted game servers registration keys”. You can generate as many of those as you’d like, as well as remove them.
Now, onto the actual setup:
At the moment, the way to set up and start up the servers is to create a .bat file with the instructions for the LO dedicated server app to execute.
Navigate to the folder containing the application. You can do so quickly by opening the app’s properties on Steam, and locating “Local Files”. Then, click on “Browse”. This should lead you to the folder containing the app’s files.
When in the folder containing the app files, create a simple TXT file. Edit the file and add the following instructions. These are an example set of instructions, you will be editing some of the fields using information from the MyRealm website.
We recommend copy-pasting this example below and editing the appropriate fields rather than typing them out manually.
Example instructions:
MistServer.exe -log -force_steamclient_link -messaging -NoLiveServer -EnableCheats -backendapiurloverride="classic-backend.last-oasis.com" -identifier=neon_server1 -port=5555 -CustomerKey=a54iesJ4Ga0MC1Pt -ProviderKey=AM0hLmhwg75xIBdH -slots=5 -QueryPort=27015 -OverrideConnectionAddress=YOUREXTERNALIP
In the CustomerKey field, you have to grab your CustomerKey from MyRealm website and set it in the field (it will look something like this -CustomerKey=a54iesJ4Ga0MC1Pt).
In the ProviderKey field, you also have to grab it from the MyRealm website, and set it in the field (it will look something like this -ProviderKey=AM0hLmhwg75xIBdH).
In the “slots” field, you will determine how many slots that server will be able to support. It’s recommended that you do not go above 100.
In the “identifier” field, you will name your server. It’s recommended to go for something simple that you can recognize, such as “neon_server1”, “neon_server2” and so on.
In the “port” field, you will need to type in any number to designate it as your port (it should look something like this -port=5555). Each server must have it’s own unique port number. Server1 can have 5555, Server2 can have 6666, etc. It has to be unique per server.
When it comes to deciding what port to use…. It’s complicated.
In the “QueryPort” field you’ll need to type in a number in a similar fashion as with the port field (for example 27015, which is Steam’s default).
QueryPort field is required only in cases where you are running multiple servers. Otherwise it’s not needed.
It’s also possible to not fill the “-overrideconnectionaddress” line, and it will utilize server’s own address. If you prefer to use this, make sure to type the line like so: “overrideconnectionaddress”, without the = sign at the end(you would normally type it with a = sign and the IP address).
Save the TXT file, and then rename it to, i.e., “server1.bat”. This will make it into a .bat file, which upon being executed will start up the server. You can monitor the progress through MyRealm.
Each server will have its own .bat file to execute it, it’s recommended that you name them properly (i.e. Server1, Server2, etc) to keep track of them.
After running the .bat file, it’s okay to close the cmd.exe that will open to execute the instructions.
It’s also possible to execute several servers from a single .bat file.
Make extra sure when renaming the file, that you remove the .txt extension, and is replaced by .bat
Remember that each new .bat file (server) created will require you to change only a few things from the previously mentioned setup. These things are: QueryPort, Port, and Identifier. These three things have to be unique per server running on the same computer.
With regards to CustomerKey and ProviderKey: You should always utilize the same CustomerKey on all servers setup for the same realm. Each server can have it’s own unique ProviderKey, but this is not necessary. The same ProviderKey can be utilized for as many servers as you want.
A Note on Port Forwarding and UPnP
In order for other players to be able to connect to your self-hosted servers / realm, you will need an external IP, and to do port forwarding. You will need a router that supports this feature. This bit is not unique to Last Oasis server hosting. It almost always will require you to login to your router, and set it up from there.
For server admins that are not manually port forwarding, UPnp is also enabled by default. This means that if your router supports UPnp, any player should be able to join your self hosted servers.
Linux Servers
When running servers on Linux, you will have to navigate to Mist/Binaries/Linux(in the dedicated server app root folder), and create a file called steam_appid.txt(create txt file and rename to that). Open the txt file, and paste 903950. Save and close.
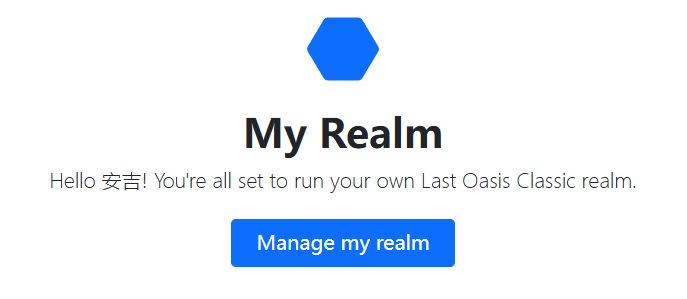
MyRealm
From here, you will be able to create, change, and generally manage the realm you are hosting and all its servers.
The dashboard will show you all servers that have been previously setup for this realm, whether or not they are active at the moment of viewing.
In the Realm management view, you will be able to edit the realm itself, as well as view statistics on things such as players online, players waiting in queues, and lifetime players on the realm.
You will also be able to change other things on a realm level such as multipliers (experience gain, foliage respawn rate, and harvest quantity), Hosting mode (Single oasis, or Multiple), settings for Events (Ancient City, Worm, Asteroid) such as whether or not they are enabled, their lifetime when spawned, activation time, and probability of spawning.
There is also the ability to password-protect the realm, change the allowed platforms (PC, Cross, XboxOnly), set a Clan cap, set the server on Whitelist mode, and add more realm admins with access to commands / cheats.
It is also possible to change clan size and clan switch cooldown from MyRealm management page (realm → settings → clan switch cooldown, this setting supports only full hours). Setting it to 0 will disable clan switch cooldown). Default on new realms will be 72 hours. The same cooldown is applied for leaving and being removed from a clan (whereas normally leaving used 3 days, being kicked used 1 day).
Each server/oasis will also have an “Automation” tab when viewing the realm. This allows any admin to change the decay time for that specific tile. Time is in UTC, and format should be something like this: “year-month-day 7:34”. Format is 24 hours.
For more control on what your servers are doing, you can also assign each server to their own specific pool. This means you can have something like backup server pools, event-only server pools (reserved for event maps), etc. Default will be a “General” pool, but that can be changed at any time.
Additional Settings
As requested by the community, there is also the additional settings options. These “additional settings” are configs/properties that you can change from MyRealm website. You can change both in a realm-basis, as well as per-oasis. These settings can vary from something simple as disabling Global Chat completely in a server(or entire realm), or more complex things like decay/maintenance configuration, or some fun stuff like enabling jumping rupus.
If you decide to have realm additional settings changed, and also oasis changes, oasis will take priority if there’s any conflict (meaning that some oases can have Proxy Walkers deploying faster than others, or safe logout timers being quicker / slower, etc etc.).
This can be done from the realm section, by simply choosing to edit an oasis, or choosing to apply additional settings for the whole realm.
At the bottom of this document you will find a list of all available Additional Settings you can change.
Any setting you don’t touch will remain as default (i.e. VulnerabilityDuration - vulnerability window of proxy Walker: If you don’t put this one there and assign a value to it, it will be default).
When applying additional settings, it will be necessary to restart the servers for them to work.
Chat Commands
Commands can be executed from the in-game chat. Commands can only be used by admins. Realm owner is able to add new realm admins from MyRealm dashboard.
The list below is all the currently available commands. It might receive updates in the future in the event we add any new commands for use in self hosted servers.
It’s important to note that using ArrowUP(when the chat interface is open) will give you a list of previously executed commands. Using it while something is typed in the chat interface will also work. For example, typing /Freeb, then arrow up, will select /FreeBuilding command.
/GiveItem [ItemName] [Amount] — replace ItemName with the proper item’s name. They won’t always match what you see in-game, but a dropdown list will be shown in the chat showing all the available items once you start typing.
When using the GiveItem command, if you do not know the name of the item, it’s possible to utilize asterisks before and after the word you used, and all possible items sharing the word will be given. For example, “GiveItem sword 10” will give 10 of each item in the game that have the word “Sword” in them./GiveItemQuality [ItemName] [Quality] [Amount] — gives items of quality, use instructions as with GiveItem command.
/GiveItemSet [Item set number] — gives item set which is specified in AdminData.json as explained under compound cheat commands & item sets section in this doc.
/EquipItemSet [Item set number] — Equips specified item set. Keep in mind this command will attempt to equip everything specified in the item set, whatever can’t be equipped won’t be acquired, use GiveItemSet to acquire the items without equipping anything.
/GiveMoney [Amount] — gives flots to the player.
/NoClip [1/0] — enable or disable NoClip for the admin executing the command.
/Teleport [Distance] — teleports towards a given distance.
/TeleportTo3D [Distance] — teleports to a set of coordinates (which can be found on the top right debug).
/TeleportWalkerTo [Coordinates] — teleports the Walker you are standing on to a set of given coordinates.
/TeleportPlayerToMe [PlayerName] — teleports specified player to the admin executing the command.
/TeleportEveryoneToMe — Teleports every player on the server to the admin executing the command.
/TeleportToPlayer — Teleports admin to the specified player.
/SetHealth [Amount] — Will set player’s health to specified amount. When going over player’s max health, it will adjust maxhealth automatically.
/SetMaxHealth [Amount] [Amount] — Similar to SetHealth command. First parameter is desired health, second parameter is desired max health. So for testing purposes, an admin can use this command as follows: SetMaxHealth 100 190 - This will give him 100 health, but a maximum of 190 which can be healed up with bandages or similar healing items.
/GiveExp [Amount] [1/0] — Gives a set amount of experience. Using 1 at the last parameter shares the EXP with clan members. Using 0 does not share it with clan members.
/FreeBuilding [1/0] — Enables or disables FreeBuilding mode. This is a server-wide command. Everything will be unlocked and free to build for all players in the server.
/LocalFreeBuilding [1/0] — Enables or disables local free building. This is not server-wide command, and it will only affect the admin executing it. It will not work for crafting stations, also, but should allow player crafting and building for free and instantly.
/SpawnWalker [WalkerName] [1] — Use 1 at the last parameter to assign this Walker to yourself, otherwise the command won’t work. Walker names in engine are different from in-game, a list will be provided at the end of this document.
/InstantConstruction [1/0] — 1 being enabled, 0 being disabled. Using this command will override construction steps for things like Walkers. Using it alongside FreeBuilding will mean that when placing a Walker, all the construction steps will be automatically done.
/SpectatePlayer [PlayerName] — Spectates specified player.
/StartSpectating — enables Spectator mode, can freely move the camera around.
/StopSpectating — disables Spectator mode, and returns to your player character.
/DestroyObject — destroys the object you are looking at. Very not recommended to use against a deployed Proxy Walker.
/ExecuteAdminCommand [Command] — Executes a compound command, which is specified and stored in json file. This command can be a combination of several other commands such as giveitem, spawnWalker, and more.
/UnlockTechTree — Unlocks everything available in the tech tree.
/SpawnMob [MobName] — spawns specified mob on top of admin executing the command.
/SpawnWorm [Distance] — Spawns the Worm mob, second argument is the distance away from the player. Recommended over 5000 so you don’t immediately die.
/AdminOpenEverything [1/0] — When enabled, allows the admin to open all doors, chests, stations, etc.
/SpawnFightClubWeaponRack [ItemSetNumber] [UseOncePerRespawn1/0] — A bit of a custom command for duel oriented events and arenas. This will spawn a structure which upon players interacting with it, will equip them with whatever item set of their choosing. The item sets are set locally, so all players using this will need to set them up in their AdminData.json (a lot easier for the admin to distribute their own .json file to everyone, if this is a thing used very often). If players don’t all have the same json file, the game will use the default itemsets. This cannot be disassembled normally, but an admin can use DestroyObject command to get rid of them.
/NextQuest [Amount] — Skips quests from the tutorial. Number equals to amount of quests skipped when executing the command.
/UnlockTech [Name] — Admin command to unlock specific techs, and also have an in-game method of knowing tech tree node names in engine. Especially useful when having removed tech tree nodes from your server with additional setting.
/ClearInventory — Clears the player’s inventory of all items, does not affect player’s equipped items.
List of Walker Names In-Engine
Can be used with SpawnWalker, and SpawnWalkerQuality
Firefly - fireflyWalker
Dinghy - dinghyWalker
Hornet - wormWalker
Falco - fastWalker
Stiletto - stilettoWalker
Schmetterling - caravelaWalker
Proxy - claimingWalker
Toboggan - fasttransporterWalker
Buffalo - buffaloWalker
Mollusk - cabinWalker
Tusker - largetransporterWalker
Titan - shufflerWalker
Spider - spiderWalkernomad
Spider w/ ballista - spiderWalkerballista
Cobra - towerWalker
Camelop - pumpWalker
Hercul - torqueWalker
Balang - FoundationWalkerTier1
Silur - FoundationWalkerTier2
Panda - PackingWalker
Raptor - birdWalker
Prototype Raptor - SunsetSkyWalker (this prototype is prone to crashing with some specific interactions - has some special features compared to normal Raptor, but it’s not really supported)
List of Resources to Spawn
Can be used with GiveItem and GiveItemQuality
Wood Shaft - woodenshaft
Rupu Pelt - rupufur
Huge Cactus Fruit - cactusfruit
Fiber Weave - fibercloth
Chitin Plate - chitinshell
Nomad Cloth - basiccloth
Clay - claylump
Rupu Gel - monkeysecretion
Purified Water - normalwater
Glass - emptyglassvial
Animal Fat - fat
Charcoal - charcoalfuel
Sterile Bandage - clothbandage
Primitive Bandage - fiberbandage
Aloe Vera - aloe
Liquid Fuel - fuel
Lava Poppy - poppy
Iron Ore - ironore2
Iron Ingot - ironingot2
Nibiran Ingot - nibiraningot
Reinforced Plank - reinforcedplank2
List of Vitamins and Potions
Can be used with GiveItem
Bonebreaker - bonebreaker
Vision Powder - cactusextract
Desert Mule - desertmule
Sinus Destroyer - flamingwater
Jojo Mojo - furyfumes
Fury Fumes - monkeycharm
Race Dust - racedust
Rupu Repellent - rupurepellent
Wanderer’s Potion - respecpotion
Worm Tincture - wormtincture
List of Knowledge Items
Can be used with GiveItem
Shattered Fragment - brokenfragment
Fragment - fragment
Animals Tablet - knowledgetabletanimal
Celestial Tablet - knowledgetabletcelestial
Elements Tablet - knowledgetabletelements
List of Walker Modules
Walker Modules - giveitem Nameboost (eg. giveitem
Weightless - baseweightboost
Merchant - cargocapacityboost
Craftsman - craftingtimeboost
Armoury - gearcapacityboost
Forager - legharvestingboost
Hearth - respawncostboost
Lifeforce - respawneffectboost
Bullrush - respawntimeboost
Sandy - sandinessreductionboost
Fortress - structuresarmorboost
Battery - torquebatteryboost
Torque - torquegeneratorboost
Watery - travelcostboost
Pack Mule - weightboost
- fireproofbost
- tetherprotectionboost
- packingtimeboost
List of All Sorts of Equipment and Ammo
Equipment
Belt
Durable Water Sack - barrel
Bone Bottle - bonebottle
Ceramic Bottle - ceramicbottle
Foraging Pouch - foragingpouch
Torque Backpack - grapplingbelt
Heavy - largebackpack
Heavy Backpack - largepouch
Makeshift Bottle - makeshiftbottle
Medium Backpack - mediumbackpack
Light Backpack - smallbackpack
Split Durable Water Sack - splitbarrel2
Split Bone Bottle - splitbonebottle
Split Ceramic Bottle - splitceramicbottle
Water Circulator - stillsuit2
Torque Battery - torquecontainer
Wingsuit - wingsuit
Boots
Feather Boots - featherboots
Fiber Sandals - t0_light_boots_01
Baskwood Boots - t1_heavy_boots_01
Rupu Fur Sandals - t1_light_boots_01
Forester’s Sandals - t1_medium_boots_01
Iron Studded Boots - t2_heavy_boots_01_w
Triple Stitch Boots - t2_light_boots_01
Carapace Boots - t2_medium_boots_01
Redwood Wood Boots - t3_light_boots_01
Gloves
Fiber Arm Wraps - t0_light_gloves_01
Baskwood Bracers - t1_heavy_gloves_01
Rupu Fur Sleeves - t1_light_gloves_01
Forester’s Sleeves - t1_medium_gloves_01
Iron Studded Gauntlets - t2_heavy_gloves_01_w
Triple Stitch Gloves - t2_light_gloves_01
Carapace Gauntlets - t2_medium_gloves_01
Redwood Wood Bracers - t3_light_gloves_01
Helmets
Fiber Headwrap - t0_light_head_01
Cloak - t3_light_head_01
Torso
Fiber Shirt and Trousers - t0_light_torso_01
Baskwood Armor - t1_heavy_torso_01
Rupu Fur Armor - t1_light_torso_01
Forester’s Armor - t1_medium_torso_01
Iron Studded Armor - t2_heavy_torso_01_w
Triple Stitch Armor - t2_light_torso_01
Carapace Armor - t2_medium_torso_01
Redwood Wood Armor - t3_light_torso_01
Tools
Advanced Pickaxe - advancedpickaxe
Beltless Grappling Hook - beltlessgrapplinghook
Broken Grappling Hook - brokengrapplinghook
Fast Grappling Hook - fastgrapplinghook
Repaired Grappling Hook - grapplinghook
Torch - handtorch
Long Grappling Hook - longgrapplinghook
Master Pickaxe - masterpickaxe2
Scythe - scythe
Simple Pickaxe - simplepickaxe
Simple Repair Hammer - simplerepairhammer
Sickle - simplesickle
Weapons
onehanded
Rawbone Club - boneclub
Spikebone Club - bonemace
Rawbone Hand Axe - brittleboneaxe
Heavy Rawbone Hand Axe - largeboneaxe
Bonespike Sword - onehandedbonesword
Bouldercut Hand Axe - onehandedironaxe2
Wyndan Hammer - onehandedironmace2
Wyndan Sabre - onehandedironsword2
Nibiran Hand Axe - onehandedraremetalaxe2
Jaggertooth Club - onehandedstoneclub
Nibiran Hammer - onehandedtitaniummace2
Nibiran Curved Dagger - onehandedtitaniumsword2
Advanced Hatchet - onehandedzirconiumaxe
Short Ceramic Hoofmace - onehandedzirconiummace
Short Malletblade - onehandedzirconiumsword
Woodcutter’s Hatchet - stoneaxe
Beat Stick - woodenclub
Firestone Kopesh - onehandedlavasword
Firestone Axe - onehandedlavaaxe
Firestone Bludgeon - onehadedlavamace
quarterstaff
Rawbone Quarterstaff - bonequarterstaff
Wyndanblade Quarterstaff - ironquarterstaff2
Blunt Quarterstaff - shortquarterstaff
Ironblade Quarterstaff - titaniumquarterstaffblade2
Nibiran Quarterstaff - titaniumquarterstaffblunt2
Traveller’s Staff - woodenquarterstaff
Paddleblade Quarterstaff - zirconiumquarterstaff
Firestone Hammerstaff - lavaquarterstaffblunt
Firestone Bladestaff - lavaquarterstaffsword
throwing
Javelin - javelin
Throwing Net - throwingnet
Lava Grenade - throwinglavabomb
twohanded
Rawbone Battle Axe - twohandedboneaxe
Rawbone Maul - twohandedbonemace
Spikebone Maul - twohandedbonespikedclub
Long Bonespike Swordstaff - twohandedbonesword
Sawtooth Sword - twohandedboneswordshort
Bouldercut Battle Axe - twohandedironaxe2
Wyndan Warhammer - twohandedironmaul2
Wyndan Flame Sword - twohandedironsword2
Nibiran Battle Axe - twohandedraremetalaxe2
Nibiran Warhammer - twohandedraremetalmace2
Jaggertooth Maul - twohandedstonemace
Sawtooth Sword - twohandedstonesword
Nibiran Decapitator - twohandedtitaniumsword2
Long Ceramic Hoofmace - twohandedzirconiummace
Singblade - twohandedzirconiumsword
Firestone Battleaxe - twohandedlavaaxe
Firestone Bozdogan - twohandedlavamace
Firestone Longblade - twohandedlavasword
Ammo
Flint Bolt - stoneharpoon
Flint Harpoon - stonetetheringharpoon
Bone Bolt - boneharpoon
Bone Harpoon - bonetetheringharpoon
Ceramic-tipped Bolt - ceramicharpoon
Ceramic-tipped Harpoon - ceramictetheringharpoon
Iron-tipped Bolt - metalharpoon2
Iron-tipped Harpoon - metaltetheringharpoon2
Fire Bolt - hullbreakerballista
Hellfire Bolt - hullbreakerballista_tier2
Catapult Boulder - catapultrock
Obsidian Catapult Rock - catapultrockcement
Hullbreaker Rock - hullbreakercatapult2
Choking Cloud - chalkcloudbomb
Cluster Bomb- carpetbomb
Fire Bomb - firebomb
Green Death Bomb - gasbomb
Sulfur Bomb - sulfurbomb
Net - net
Dart - repeaterbolt
Rupu Rock - rupurock
Scattershot - scattershot
List of all Tech Tree nodes:
Anything mentioned as “not supported” does not necessarily mean that it won’t work. But they will be prone to cause crashes, not work, etc. All of the items marked as not supported are not in the official game, and they are only available through admin commands.
Refined Resources:
BasicCloth - NomadCloth
BoneGlueProduction - Bone Glue
ClayExtraction - Clay
FiberCloth - Fiber Weave
Fragment - Fragment
ReinforcedPlank - Reinforced Plank
Resin - Earth Wax
Rope - Rope
SimpleWaterPurification - Purified Water
SulfurWaterPurification - Liquid Fuel
Tablets - Random Knowledge Tablet (woodworking station)
WoodenShaft - Wooden Shaft
WalkerComponent - WalkerMechanism
Vitamins:
Bonebreaker - Bonebreaker
CactusExtract - Cactus Extract
DesertMule - Desert Mule
FlamingWaterNew - Sinus Destroyer
FuryFumes - Fury Fumes
MonkeyCharm - Jojo Mojo
RaceDustNew - Race Dust
RupuRepellent - Rupu Repellent
WormTincture - Worm Tincture
Equipment:
AdvancedBackpack - Heavy Backpack
AdvancedPickaxe - Advanced Pickaxe
Barrel - Durable Water Sack
BeltlessGrapplingHook - Beltless Grappling Hook
BoneAxeTwoHanded - Rawbone Battle Axe
BoneBottle - Bone Bottle
BoneClub - Rawbone Club
BoneMace - Spikebone Club
BoneMaceTwoHanded - Rawbone Maul
BonePolearmTwoHanded - Spikebone Maul
BoneQuarterstaff - Rawbone Quarterstaff
BrittleBoneAxe - Rawbone Hand Axe
CeramicBottle - Ceramic Bottle
ClothBandage - Sterile Bandage
FastGrapplingHook - Fast Grappling Hook
FeatherBoots - Feather Boots
FiberBandage - Primitive Bandage
FiberClothArmor - Fiber Shirt and Trousers
Flare - White Flare
FixedGrapplingHook - Default grappling hook
ForagingPouch - Foraging Pouch
GasMask - Gas Mask
GrapplingBelt - Grappling Belt
HandTorch - Torch
HeavyTorqueContainer - Compacted Torque Battery
ImprovedBackpacks - Medium Backpack
ImprovisedBottle - Improvised Bottle
IronQuarterstaff - Wyndanblade Quarterstaff
Javelin - Javelin
LargeBoneAxe - Heavy Rawbone Hand Axe
LargePouch - Large Gathering Pouch
LavaBottleLarge - Infused Obsidian Bottle
LavaBottleSmall - Obsidian Flask
LavaQuarterstaffBlunt - Firestone Hammerstaff
LavaQuarterstaffSword - Firestone Bladestaff
LongGrapplingHook - Long Grappling Hook
MakeshiftBottle - Makeshift Bottle
MasterPickaxe - Master Pickaxe
NetPouch - Net Pouch
OnaHandedLavaMace - Firestone Bludgeon
OneHandedBoneSword - Bonespike Sword
OneHandedIronAxe - Bouldercut Hand Axe
OneHandedIronMace - Wyndan Hammer
OneHandedIronSword - Wyndan Sabre
OneHandedLavaAxe - Firestone Axe
OneHandedLavaSword - Firestone Kopesh
OneHandedRareMetalAxe - Nibiran Hand Axe
OneHandedTitaniumSword - Nibiran Curved Dagger
OneHandedTtitaniumMace - Nibiran Hammer
OneHandedZirconiumMace - Short Ceramic Hoofmace
OneHandedZirconiumAxe - Advanced Hatchet
OneHandedZirconiumSword - Short Malletblade
Scythe - Scythe
ShortQuarterstaff - Blunt Quarterstaff
SimpleBackpack - Light Backpack
SimplePickaxe - Simple Pickaxe
SimpleRepairHammer - Simple Repair Hammer
SimpleSickle - Simple Sickle
SplitBarrel - Split Durable Water Sack
SplitBoneBottle - Split Bone Bottle
SplitCeramicBottle - Split Ceramic Bottle
Stillsuit - Water Circulator
StoneAxe - Woodcutter’s Hatchet
StoneClub - Jaggertooth Club
ThrowingLavaBomb - Firebomb (throwable)
ThrowinNet - Throwing Net
TitaniumQuarterstaffBlade - Nibiran Quarterstaff
TitaniumQuarterstaffBlunt - Ironblade Quarterstaff
TorqueContainer - Torque Battery - Nice
TwoHandedBoneSword - Long Bonespike Swordstaff
TwoHandedBoneSwordShort - Sawtooth Sword
TwoHandedIronAxe - Bouldercut Battle Axe
TwoHandedIronMaul - Wynda Warhammer
TwoHandedIronSword - Wyndan Flame Sword
TwoHandedLavaAxe - Firestone Battle Axe
TwoHandedLavaMace - Firestone Bozdogan
TwoHandedLavaSword - Firestone Longblade
TwoHandedRareMetalAxe - Nibiran Battleaxe
TwoHandedRareMetalMace - Nibiran Warhammer
TwoHandedStoneMace - Jaggertooth Maul
TwoHandedTitaniumSword - Nibiran Decapitator
TwoHandedZirconiumSword - Singblade
Wingsuit - Wingsuit
WoodenClub - Beatstick
WoodenQuarterstaff - Traveller’s Staff
ZirconiumMaceTwoHanded - Long Ceramic Hoofmace
ZirconiumQuarterstaff - Paddleblade Quarterstaff
Construction:
AmmoChest - Ammo Chest
AutoTurret - Rupu Sling
Ballista - Ballista (there is also Ballista_02/03/04, but those are not available in the official version of the game)
BaseContainer - Base Container (not officially supported buildable)
BaseMaintenanceChest - Base Maintenance Chest
BaseWalkerPackerLarge - Large Base Walker Packer
BaseWalkerPackerSmall - Small Base Walker Packer
Baskets - All baskets
BattleFan - Battle Fan
Bed - Bed
BigRopeLadder - Big Roped Ladder (not supported)
BoardingPlank - Boarding Plank (not supported)
Campfire - Campfire
Carpets - Carpets
Catapult - Catapult
CauterizingStation - Cauterizing Station
CementFoundation - All cement structure parts
Chair1 - Chair Throne
Chair2 - Chair Simple
Chair3 - Chair Comfortable
ChestTrap - Trap Chest (not supported)
Crane - Crane
DefensiveTower - Defensive Tower
DyeingStation - Dyeing Station
Exoskeleton - Exoskeleton
FallingRockTrap - Falling Rock Trap (not supported)
FiberWorkingStation - Fiberworking Station
FiberWorkingStationTier_02 - Advanced Fiberworking Station
FireGoblet - Fire Goblet
Flags - All flags
Furnace - Furnace
Furnace_Tier2 - Advanced Furnace
GiantWallPacker - Giant Wall Packer
GiantWalls - Giant Walls
GiganticChest - Gigantic Chest
GrapplingBeltChargingStation - Grappling Belt Charging Station (not supported)
GuardRail - Guard Rail
Hammock - Hammock
HoseStation - Hose Station
HumanSling - Human Sling (not supported)
ItemRepairStation - Repair Station
Kite - Kite (not supported)
LampsHanging - Hanging Lamps
LampsOverhanging - Overhanging Lamp
LampsStanding - Standing Lamp
LargeChest - Large Chest
LavaChestLarge - Obsidian Canister
LavaChestSmall - Obsidian Pot
Lumbermill - Lumbermill
MediumChest - Medium Chest
NetThrower - Net Thrower
ObsidianMachine - Obsidian Machine
PedestalChest - Pedestal Chest (not supported)
PoachingHut - Poaching Hut
Quarry - Quarry
Rangefinder - Rangefinder
RemoteBallista - Remote Ballista
Repeater - Repeater
SandBagWall - All Sandbag structures
Sandbed - Sandbed
SandQuarry - Soil Excavator
SawBladeTool - Sawblade Tool
SawBladeTool_Tier2 - Long Sawblade
Scaffolding - Scaffolding (not supported)
ScattershotGun - Scattershot Gun
Slingshot - Slingshot
SmallChest - Small Chest
SteeringLeversCage - Steering Levers Cage
Stomping Station - Nice
Table - Table
Toolpod - Toolpod
TorqueWindmill - Torque Windmill
TrapDoor - Trap Door (not supported)
TripwireTrap - Tripwire Trap (not supported)
WalkerBarriers - Walker barriers (plank, support, gate)
WalkerClimber - Walker Climber
WaterBagLarge - Large Water Bag
WaterBagMedium - Medium Water Bag
WaterBagSmall - Small Water Bag
WaterBed - Water Bed (not supported)
WaterCondenser - Water Condenser
WaterFiltration - Purification Station
WoodenWallsHeavy - Reinforced Wood (Solid, T3 Wood)
WoodenWallsMedium - Medium Wood Base (T2)
WoodenWallsLight - Light Wood Base (T1)
Ammo:
BoneProjectiles - Bone ammo
CarpetBomb - Cluster Bomb
CeramicProjectiles - Ceramic ammo
ChalkBomb - Chalk Bomb (smoke)
ExplosiveBolt - Explosive Bolt
ExplosiveDart - Explosive Dart
FireBomb - Fire Bomb (siege)
FloatingMine - Floating Mine
GasBomb - Green Death Bomb
Healing Bomb - Aloe Goo Bomb
HullBreakerBallista - Fire Bolt
HullBreakerBallista_Tier2 - Hellfire Bolt
HullBreakerBallista_Tier3 - Hardened Hellfire Bolt
HullBreakerCatapult - Charged Boulder
HullBreakerScattershot - Hullbreaker Scattershot
InsectBomb - Insect Bomb
MetalProjectiles - Iron Tipped Bolt+Harpoon
ScattershotAmmo - Scattershot ammo
SulfurBomb - Sulfur Bomb
TetheringHarpoon - Flint Harpoon
Walker related:
BasicWalkerEquipment - Steering Levers
BattleshipWalker - Battleship Walker(not supported)
BuffaloWalker - Buffalo Walker
BirdSkyWalker - Raptor Sky Walker
CabinWalker - Mollusk Walker
Caravela Walker - Schmetterling Walker
CargoWalker - Tusker Walker
ClaimingWalker - Proxy Walker
DinghyWalker - Dinghy Walker
FastTransportWalker - Toboggan Walker
FastWalker - Falco Walker
FireflyWalker - Firefly Walker
FoundationTier1Walker - Balang Walker
FoundationTier2Walker - Silur Walker
HouseWalker - Domus Walker
PackingWalker - Panda Walker
PumpWalker - Camelop Walker
ShufflerWalker - Titan Walker
SiegePod - Gunpod
SiegePodShellTier2
SiegePodShellTier3
SmallWalkerPacker
SpiderWalkerBallista - Spider Walker w/ Ballista
SpiderWalkerNomad - Nomad Spider Walker
StilettoWalker - Stiletto Walker
TorqueGeneratorWalker - Hercul Walker
TowerWalker - Cobra Walker
WormWalker - Hornet Walker
Additional Settings:
ClaimVulnerabilityDuration = vulnerability window of proxy Walker, in seconds.
ClaimProtectionDuration = time between vulnerability windows of proxy Walker, in seconds.
ClaimActivationDuration = time it takes to activate proxy after deploying, in seconds - Do not use 0 (zero), or it will most likely bug.
ClaimCooldownBeforeDeploy = time in seconds before proxy can be deployed after it’s built.
NoBonusAfterMurderDuration = no bonus is generated if the player was murdered within this duration, in seconds.
GroundToWalkerTetherHealthMulti = Multiplier to tether hp when tethering Walkers from the ground (ground ballistas).
SafeLogOutTimeout = time to “transfer to lobby”, in seconds.
QuickSafeLogOutTimeout = time to “transfer to lobby” from travel area or trade station, in seconds.
ClaimChanceForBonus = % chance for resources to appear as a bonus inside the Proxy inventory.
MinCombatCooldown = min duration of combat cooldown from attacking Walker or structure.
MaxCombatCooldown = max duration of combat cooldown from attacking Walker or structure.
CombatCooldownWallDamaged = combat cooldown from damaging a wall.
CombatCooldownWallDestroyed = combat cooldown from destroying a wall.
OneSecondsCooldownDamage = how much damage need to be dealt to a structure to increase combat cooldown by 1 second.
StructureDecayMinDamagePerHour = damage from decay per hour.
StructureDecayMaxDamagePerHour = damage from decay per hour.
StructureDailyMaintenanceFactor = daily maintenance cost from total structure cost, 0 will disable decay completely.
FlotillaTaxRate = The default flotilla (money is removed from the game) tax rate for tradestations.
ClaimTaxRate = Claim (money is given to claim owner) tax rate. Is added to flotilla tax rate for full tax.
SellOrdersUpfrontTax = Listing fee that is paid upfront when creating sell order, is deducted from flotilla tax later when order is accepted.
AuctionProlongationOnNewBidSeconds = Time added to auctions when new bid is made
AutoLogoutPeriod = Period for automatically logging out inactive Walkers. Setting it to -1 will disable logging out inactive Walkers. Be aware this can be bad for performance on active tiles.
LogoutEnemyWalkerPeriod = How long does it take to transfer enemy Walkers to the lobby. Setting to -1 will remove the option to logout enemy Walkers.
DisablePvpDamage = setting to 1 will disable PvP damage.
RespawnCostMultiplier = Water cost to respawn after dying, multiplier is based on the game’s default.
RespawnTimeMultiplier = Time to respawn after dying, multiplier is based on the game’s default.
DehydrationRate = Multiplier for dehydration rate, based on the game’s default - 0 will disable thirst completely.
DisableGlobalChat = setting to 1 will disable global chat.
TimeBetweenAuctionsMultiplier = multiplier for time it takes for new auctions to appear after the old have been finished.
AuctionStartingPriceMultiplier = multiplier for starting price of auctions.
PublicKillMessages = setting to 1 will make kill messages be seen by anyone in the oasis.
MaxPlayerStat = Default is 100. This config will control the max stat players can reach. It will affect all stats (for example, MaxPlayerStat=20 will make it so all players can only reach 20 in all stats). Setting to above 100 won’t work.
PlayerWeightLimitMultiplier = this config will control players’ weight limit multiplier. Default is 1 (which is 100kg).
ItemWeightMultiplier = this config will control item weight multiplier for all items in the game. Default is 1.
DisableRangedDamage = 1/0 - this config will control whether or not ranged weapons deal any damage (against anything). This impacts all ranged weapons, from javelins, to fire arrows.
DisablePvpDamageForPlayers = this config will control whether or not PvP damage against players is enabled, 1/0.
DisablePvpDamageForWalkers = this config will control whether or not PvP damage against Walkers is enabled, 1/0.
DisablePvpDamageForStructures = this config will control whether or not PvP damage against structures is enabled, 1/0.
ExperienceGainMultiplier = this config will control the multiplier for experience gain for all players in a specific server.
FoliageRespawnRateMultiplier = this config will control the multiplier for the foliage respawn rate in a specific server.
HarvestQuantityMultiplier = this config will control the multiplier for harvest quantity for all players in a specific server. ** Note on Experience/Foliage/Harvest multipliers - They also exist in a realm-wide manner, on MyRealm config. These multipliers here exist so you can edit them on a per-oasis basis. If the realm-wide multiplier is over 1.0, it will conflict with oases with different multipliers. Neither take priority, instead it’s MyRealm*Oasis multiplier (so if realm has 5 and oasis has 5, total multiplier becomes 25).
DisabledTechs = this config is not 1s and 0s. You will have to navigate to the section outlining all tech tree nodes, which will give you the names for the nodes you’d like to disable. Separate each tech with a comma, no spaces. As an example: If you don’t want torches, stone walls and clay structures in your server, the setting will look like this - DisabledTechs=StoneStructures,ClayStructures,HandTorch - You will be able to find all the names in the list above, alongside equipment, Walkers, knowledge, etc. The names might not be consistent with the ones you see in-game.
WalkerSpawnpointSwitchingCooldown = this config defines whether or not there is a cooldown for when the player wants to assign themselves to another Walker(assign their spawnpoint), in seconds. 0 is default.
JumpingRupuChance = this config defines the chance for rupus to jump on top of Walkers if their crew aggroes them.
RespawnOnWalkerCostMultiplier = this config determines multiplier for player’s respawn cost for when respawning on a Walker.
MobsRespawnTimeMultipliers = this config determines multiplier of respawn time for mobs. Default is 1.
MobsNumbersMultipliers = this config determines amount of mobs spawned when a mob respawns - This will not affect amount of mobs spawned by POIs such as rupu camps.
PrivateServerAncientCraftingSiteSpawnChance = this config determines chance to spawn ACS for all servers in a realm, or per individual server(note, when using this on individual server, make sure it’s not activated, otherwise it will not work).
PrivateServerTradeStationSpawnChance = This config determines chance to spawn Trading Station on all servers in a realm, or per individual server(note, when using this on individual server, make sure it’s not activated, otherwise it will not work).
Example default settings:
ClaimVulnerabilityDuration=10800
ClaimProtectionDuration=75600
ClaimActivationDuration=3600
ClaimCooldownBeforeDeploy=7200
NoBonusAfterMurderDuration=43200
GroundToWalkerTetherHealthMulti=0.15
SafeLogOutTimeout=120
QuickSafeLogOutTimeout=20
ClaimChanceForBonus=0.2
MinCombatCooldown=30
MaxCombatCooldown=300
CombatCooldownWallDamaged=300
CombatCooldownWallDestroyed=900
OneSecondsCooldownDamage=25
StructureDecayMinDamagePerHour=300
StructureDecayMaxDamagePerHour=700
StructureDailyMaintenanceFactor=0.125
FlotillaTaxRate=0.05
ClaimTaxRate=0.05
SellOrdersUpfrontTax=0.02
AuctionProlongationOnNewBidSeconds=180
AutoLogoutPeriod=21600
LogoutEnemyWalkerPeriod=900
RespawnCostMultiplier=1
RespawnTimeMultiplier=1
DehydrationRate=1
AuctionStartingPriceMultiplier=1
TimeBetweenAuctionsMultiplier=1
MaxPlayerStat=100
PlayerWeightLimitMultiplier=1
ItemWeightMultiplier=1
DisableRangedDamage=0
DisablePvpDamageForPlayers=0
DisablePvpDamageForWalkers=0
DisablePvpDamageForStructures=0
ExperienceGainMultiplier=1
FoliageRespawnRateMultiplier=1
HarvestQuantityMultiplier=1
PublicKillMessages=0
MobsNumbersMultipliers=1
MobsRespawnTimeMultipliers=1
RespawnOnWalkerCostMultiplier=1
WalkerSpawnpointSwitchingCooldown=0
JumpingRupuChance=0
Compound cheat commands and item sets:
Compound cheat commands are several commands executed from a single one. For example "/ExecuteAdminCommand SiriousSet" will give a set of armor, water, etc.
Item sets are a list of items specified under “ItemSets” in the json file mentioned below. Item sets can be used with EquipItemSet command, or paired with ExecuteAdminCommand. Their purpose is mainly to make the creation of compound commands quicker, and easier.
Both can be found on the AdminData.json file in \AppData\Local\Mist\Saved. You can add new ones, edit, and remove the basic commands and itemsets directly from the json file.
The way to add a new compound cheat command is quite simple. Copy one of the already existing commands, paste it on a new line under “Commands” section on the json file, and edit the variables as applicable.
For example, if you want a command to do the same thing as “SiriousSet”, but different items, it’s as simple as editing the items listed in it. In the case of SiriousSet, it’s not just using the giveitem cheat, but it’s also using “EquipItemSet 7”, so if you were to use it, it’d be recommended to also edit ItemSet 7(under “ItemSets”), or to create a new one with the desired items. All the items in the game can be found under “List of all sorts of equipment”, a few sections above this one.
Keep in mind that each new line is separated from the next one with a comma, while the last one should not have a comma at the end. Example of compound commands below:
"Scenario": ["EquipItemSet 3","GiveExp 35149","GiveItem NormalWater 20 0","FreeBuilding","spawnWalker WormWalker true"],
"Starter": ["EquipItemSet 6","giveitem clothbandage 30 0","giveexp 100000 0","giveitem normalwater 100 0"],
"SiriousSet": ["giveitem clothbandage 30 0","EquipItemSet 7","giveitem normalwater 100 0"]
From “Scenario” example - the command is equipping the player with ItemSet 3, giving EXP, giving normalwater item, spawning a Walker, etc. All from a single command which can be edited to do different things.
It’s recommended to exit the game before adding new commands and/or itemsets to the json file. You will need to restart the game in order to be able to use them.
If you want other admins to be able to use the commands, make sure to send them your json file so they have access to the same ones.
A note on FreeBuilding and GiveItem commands:
Having FreeBuilding enabled will unlock access to some buildables and items which are normally not available without this command enabled. Majority of these items and buildables will most likely not work, or have one or more issues.
Keep in mind that any bugs or issues related to these items and buildables are not really important, as they cannot happen without the use of cheat commands. In the same fashion, any bugs or issues unlocked due to the presence/interactions of/with these items and buildables, they don’t really matter either, for the same reason stated before. Some of them can be fun(like trap doors, spikes, etc), but some will most likely not work at all, such as rope ladders, human sling, etc. It’s quite possible that you will at some point see some of these things be introduced to the official version of the game, especially if we see players having fun with them.
- 感谢你赐予我前进的力量
-
 微信
微信  支付宝
支付宝